Showing posts with label Coffee And Cameras. Show all posts

Tuesday, March 17, 2015

Coffee And Cameras: Finding The Light

{Previous posts:  Editing, Selfies, Composition, Inspiration}

Photography is ALL about the light. Light is everywhere! Harness it and use it to make your images stand out clear as day!

*Light in your space*
I shoot a lot of images in my apartment and I am lucky enough to have a HUGE window that lets in tons of light. Find the room in your house that lets in the most natural light and set up there.
I have a few favorite plain backgrounds that I like to use for product shots and different set ups. I find moving them to where the light is makes for the best shot possible.
Background Ideas:
  • Poster boards - in all patterns and colors
  • Tile floors
  • Carpet
  • Bedding
  • Furniture {desks, couches, tables, chairs, counter tops}

TIPS: Using a white poster board as a reflector can bounce even more light into where you are shooting.

*Shooting outside*
The BEST time to shoot outdoors is "Magic Hour," the two hours before sunset. Light is low in the sky and super warm and flattering.
Magic Hour also gives you lots of shady spots to shoot. If you have to shoot during mid day, shade is your best friend. It helps keep things from getting TOO bright and can help your subjects to stay cool and not squint into the sun.
TIP: Whenever I'm shooting outside, I always look for a shady place with a nice clean background. Let your subject be the star of the shot.

*Out and About*
I am ALWAYS the one Instagraming my food! I cannot help but try to create a beautiful image of something so yummy! Look around for interesting surfaces and of course light!
Did you find this post helpful?  Is there a certain topic you would like me to tackle in the future?!  Let me know in the comments below and don't forget to share if this post helped you!  

{FOLLOW me on INSTAGRAM}

Tuesday, February 17, 2015

Coffee And Cameras: Finding Inspiration

{Previous posts:  Editing, Selfies, Composition}

Finding Inspiration on Instagram is so easy and one of my favorite things to do!  In this edition of Coffee & Cameras I want to share with you how I stay inspired. I am always working to create images I am proud of that people want to double tap!  Here are some of the ways I do it.

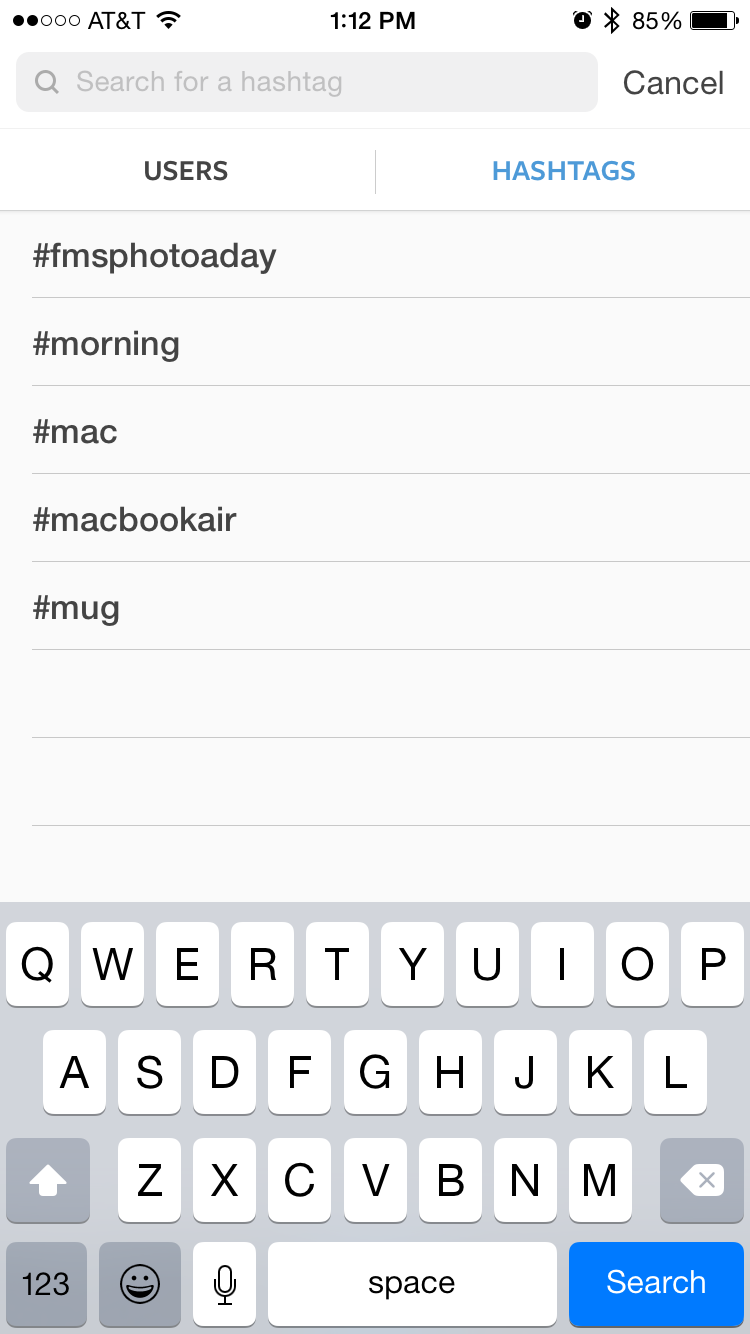
1.  Hashtags.  This might need to be a post in itself.  I think hashtags help a lot in the Instagram community.  I LOVE organization and the hashtags do just that.  They organize everything you like into neat tidy lists.
Pick a word or phrase and hit the microscope at the bottom of your screen.  Type in your designated hashtag and search away.  I can lose myself for hours in searches.  It is such a simple way to find new accounts to follow and see different ways of thinking, when it comes to creating a photograph.

A great weekly one #WPH....{weekend hashtag project} is run by Instagram and I always find the photos they end up choosing for their blog inspiring.  The exercise always pushes me to want to be as good as the ones they pick.
You all have seen this image up on Insta all over the place.  I think it appeals to me so strongly is because it is the definition of me.  I'm a bit of a homebody, I love my coffee and I love being cozy!  It took many times to get it just the way I liked it and even then I was nervous to post it.  BUT being nervous is a good thing...so I did it and I'm happy I did.

2.  @Instagram Suggestions.  I don't follow every suggestion from Instagram, but they know their community and always feature someone worth looking into.  A person working the app differently and creatively.

A few of their features have become my favorite accounts:  @the_line_up, stopping strangers on the street for a quick portrait session is completely outside of my comfort zone, which means it could be a good thing!  Would you do it?
@polina_che, I fell in love with her photography of floras, but come to admire her sense of style and consistency.  If you look at my Insta, it is not very consistent looking.  As a brand, you wouldn't know straight away looking at a photo that it was mine.  That is something I would love to develop more in the coming year.

@nikolaikrusser, I've always been a fan of ballet and seeing it captured on "film" mesmerizes me.  Finding entire accounts dedicated to the art is a must follow for me and inspires me outside in my own dance life, which in turn inspires the photos I take in my normal life.

3.  What are the people you are following liking?  Have you ever gone to your comments page and clicked on the "following" tab at the top.  If you do you will see a list of what people you have chosen to follow and what they are liking.
The images are quite small, but I like that.  It makes me pick and choose which images I want to view closer.  The small images pull me in and make me want to see more.  That is exactly what I want for my own photography.  I want it to jump out at the viewer and make them want to like it.  Don't you?
I love the high saturation on this image.  I love the large amount of blank space and I love that it captures exactly how that day was.  Living in LA can be a bit overwhelming, but when you step back from a situation and look at what makes the something unique you can discover what you didn't know you could ever feel.

4.  Photo A Day Challenges.  I've been a participate in the Fat Mum Slim Photo A Day Challenge since 2012.  Before that even I was pushing myself to create one good image a day, but I didn't ever think it could be more than that.  Since then this particular photo a day challenge has been apart of my daily life.
I find myself pushing myself everyday to create something worthwhile, interesting and different.  Sure some days I get lazy, I don't like what I've come up with or I just don't like the prompt.  But it always keeps my brain thinking and observing my surroundings.
I am going to admit that sometimes I just am in love with an image I create.  Is that weird?  I guess not since that is what I strive others to feel when they seem my images.  This one was one of the very first of FMS photo a day challenges of 2015 and I just love it so much.  It feels like me, but not actually showing me.

Pink, Union Jack and my Lamplighter "tattoo."  Nerdy & Girlie.  That is what photography should be, you in an image without having to actually see you.

Did you find this post helpful?  Is there a certain topic you would like me to tackle in the future?!  Let me know in the comments below and don't forget to share if this post helped you!  

NEXT TIME on Coffee and Cameras:  Finding The Light

{FOLLOW me on INSTAGRAM}

Wednesday, February 4, 2015

Coffee and Cameras: Composition

{Previous posts:  Editing, Selfies}

Composition is what makes your photography interesting.  Everyone has their own style, but in this Coffee and Cameras date, I want give you some ways to step out of the square Instagram box and find a new view on your photography.

{Centering}
I think that centering a shot is the most natural thing for a person to do when starting out in photography.  Centering makes a photo nice and neat.  You can understand what the photo is about and appreciate the details.  The shot on the right was even featured on the Republic of Pie's Instagram!
TIP:  If I am centering something in a photo, I am also trying to do something different as well.  A large blank space, bright colors or the special pose.  Don't be afraid to center your photos, but don't be afraid to step out of the box as well!

{The rule of 1/3s}
The rule of 1/3s is a way to take balanced and interesting shots.  Placing the subject on one of the points of the grid below lets the eye move naturally and comfortably through a shot.
TIP:  Turn on iPhone grid.  Settings | scroll down to Photos & Camera | scroll down to Grid | Slide on.  Using the grid as a guide can help until you obtain the natural ability.

{Look UP}
How often do we look up really?  As a trained photographer even I have a hard time looking up sometimes.  When you do, you can get a look at something we don't see everyday.

TIP:  Look beyond the clouds.  Art, buildings are signs a good start to mixing it up creatively.

{Look DOWN}
The same applies to looking down.  Which I have to say I do more often than not.  I am completely guilty of the shoe shot.  I love shoes!

TIP:  Patterns, colors or something unique all perfect ways to capture what we walk over each day.

{From Above}
This might be the hardest of the shots to conquer.  We as photographers have to step to of our comfort zone of being on solid ground and potentially invade someone's personal space. Two things we as humans have a difficult time doing, especially with a stranger, or sometimes even someone close to us.  
TIP:  Once you begin to get creative with your shots, you will become more and more daring.  You will realize that it really isn't that difficult after all and your shots will begin to show your boldness.  The first time is always the most difficult.

{From Below}
Another hard angle to crack, but if you have time and someone you trust, or even yourself, you can get this!  
TIP:  The camera is your mirror.  Move it until you feel you have your best angle.  Below is not the most flattering shot for anyone, but it is fun to try something new once in a while, especially if there is something above you or your subject that is interesting to look at. Talking to your subject helps as well...get them comfortable and be comfortable together!

{Framing a shot}
Can you literally frame your subject with something?  Doing so can draw the eye into exactly where you intend for it to go.
TIP:  You are always the one in control of your photography.  Tell the story you want to tell.

Did you find this post helpful?  Is there a certain topic you would like me to tackle in the future?!  Let me know in the comments below and don't forget to share if this post helped you...but wait there is MORE....

As a photography nerd I cannot help but adore all of the awesome products on Photojojo's site!  They have graciously given The Nerdy Girlie readers a coupon code: NerdyGirlie2015.  Just enter it at checkout to have you can take $5 off any purchase over $10 until 3/20/2015!

NEXT TIME on Coffee and Cameras:  Finding inspiration.

{FOLLOW me on INSTAGRAM}

Tuesday, January 27, 2015

Coffee and Cameras: The Selfie


I don't know what it is about the selfie, but I have never been a big fan of it myself.  Truth be told, I'm always embarrassed to post one!  But sometimes I just feel really good about myself that I have to post one.  In a world where we are bombarded by what "perfect" is suppose to look like it is rare that I feel that way and by posting a selfie, I feel like I can say hey, I'm happy with ME!

Back at the end of 2014 when I FINALLY upgraded from the iPhone 4s to the 6 a new world of selfies opened up to me!  The front facing camera is almost as good as the regular camera!  In the correct light, you can get a very good picture!  Then I discovered the timer and my life changed!

{Timer}
The timer allows you to set either a three or ten second countdown.  The numbers count down on your screen and allow you to get prepared for the shot.  Usually I use three seconds for my own selfies and ten for a group selfie.  

TIP:  Take some time before you hit the timer to find an angle that you feel you look best at.  Use the front facing camera as a mirror!  I've done this many times while traveling and a mirror hasn't been handy.

Once the countdown reaches zero, the camera takes a burst of TEN shots!

TIP:  Take as many photos as you wish until you get the one YOU like!  My magic number is three.  That is thirty shots to choose from and funnily enough, I usually go with the first!

{Hand-held Selfie}
The first one we all master, am I right?  My big TIP for the hand-held selfie is lighting.  I like to do a full 360 degree turn to find out which is the best position for lighting.  Second TIP might be more my own preference, but I like a clean or interesting background.  Within the good lighting, find a background that let's YOU be the start of the shot.
The hardest thing, I think, about the hand-held selfie is not getting your arm in the shot.  It just takes maneuvering the camera.  You are in control, work with the camera until the angle is good!

{Propped Timer Selfie}
Like I said above, the self timer is a game changer when it comes to selfies.  It took me about a month to realize that I could prop up my phone and take my own picture!  Usually I have to wait for The Hunny to be around.  I give him a detailed description of what I envision for the shot {the OCD photographer in me} and after about twenty shots, MAYBE I get one that I like.
With the self timer, I can set up a shot just how I like and get it done in a few timer bursts!

TIP:  Background choices!  I mentioned above that the background can take away from you or it can ADD to you.  While in Vegas and in height of my The 1975 obsession phase, THIS amazing mirror was in the room.  The first day was a fluke, but I loved it so much I had to do one everyday!  Be happy I don't have this at home!

What you cannot see is that the room had all of our luggage and junk around.  I had to be VERY conscious of what could be seen in the mirror and each day I learned more.  The first one you can see my luggage handle.  Again maneuvering the camera is what selfies is all about.

{Couple Selfie}
I feel like the couple selfie is a more spontaneous beast than any other selfie.  You are hanging with your bestie and you realize, we need to document this awesome time in our friendship.  So in the couple selfie, I think it is more about chemistry than anything else.
TIP:  Let your true self come through in a couple selfie.  Feed off each other and only do one burst!  This is a quick spontaneous moment in time.  Capture it, share it and put the phone away.  Stay in the moment with the people you love.

{Group Selfie}
I never thought of doing a selfie with more than one person before, but then came the holidays.  The iPhone 6 has such a wide camera that I've been able to get eight people in a single shot!  The first one was a bit hard, but I've learned a couple things....
TIP:  The person taking the picture should be a bit in front of everyone.  This gives you more room in the shot.  Again using the phone like a mirror get everyone scene and then set the timer.  I find the ten second one best for group shots so everyone can get settled before the burst starts.

{Details Selfie}
Especially for us nerds, it is all about the Easter Eggs.  I try to always have a bit of nerdy flair on me at all times and when someone notices, that makes my day!  So why not share those details in selfie form?!

WHEW...I didn't realize that so much went into posting the perfect selfie!  I like that YOU can be in control of your own self image.  I think that is a powerful thing for anyone with self-esteem issues, and isn't that all of us really?

Did you find this post helpful?  Is there a certain topic you would like me to tackle in the future?!  Let me know in the comments below and don't forget to share if this post helped you!  

NEXT TIME on Coffee and Cameras:  Composition.

{FOLLOW me on INSTAGRAM}

Tuesday, January 13, 2015

Coffee And Cameras: An Introduction and How to Edit Your Mobile Photography!

Grab your coffee, sit down and join me while I share some of my favorite mobile photography tips with you!  These tips will be specifically for you mobile photography, but can be applied to your regular camera as well.

I've been taking pictures for as long as I can remember, thanks to my Nana.  Like most of you, I began with film and then in college I finally bought my very first professional DSLR {Digital Single Lens Reflex} camera!  It was a Nikon since that is what I had been working with at the Penn State newspaper and it was only 4 megapixels!
It is funny to think back on how HUGE that camera was and how small my new iPhone 6 is with it's 8 megapixel camera!  In this new series, I want you to sit back and relax with your coffee while hopefully learning something new!

I LOVE photography and I LOVE sharing my photos with you on Instagram.  In this first article, I want to show you how I edit my photographs for sharing.  In truth, a LOT of the time, I am down on myself for the photos I take in camera.  I've gotten better at getting as much as I can right when I shoot, but it is not until I get home and begin the editing process that I truly begin to love my pictures.

{EDITING}

The very first app I go to for editing my photos on the phone is Afterlight {for Android and iPhone}.  I always take my photos with the phone's camera and then import them into Afterlight.  This way you can take as many photos as you like and pick your favorite to edit.
This is a photo, just as I shot it on the phone.  Again, as I looked at it, I wasn't in love with it.  I tried to center it as much as I could and I knew I wanted a lot of empty space at the top.  One of those two things was accomplished.

A little background on this shot.  I participate in the FMS Photo A Day Challenge on Instagram {click the link, it is quite fun!} and the prompt for this day's shot was "us."  I got all "cute" for an "us" photo and didn't like how they were turning out.  Then I realized I had this nice plain background behind us and both of our personalities represented in the doughnuts we were consuming!  This idea popped into my head and I got something, I think, unique and most importantly out of my personal creative box.  Don't be afraid to try something new and usual!

Photos are usually never bright enough for me, so I always do that first.  I mess around with both the exposure and brightness scales.  Please take these tips and use them to find YOUR style.  Mine is constantly evolving and I hope these tips will be a stepping stone to making your the photographer you were meant to be!
Here is the image brightened and cropped into a square.  For the most part I do square pictures, but sometime I get a really nice wide shot that I love and I use the borders in Afterlight to make the photo square and still share the entire scene.  I will share one of those at the end of this post.
Here are some of my favorite filters to use on Afterlight.  These are my go to filters almost every time.  For black and white shots I usually like, bright and light, COAL {under the original tab} gave that to me with a little bit of tweeking.

ELM {under the seasons tab} is probably the filter I use most often.

Followed second by ANTLER {seasons tab}.  Sometimes I want warm, sometimes I want cool.  Depends on my mood and the photo.

Last is Row {seasons tab}, but honestly, sometimes I click through every filter in the seasons tab {my favorites} and end up picking #nofilter.  Do what YOU feel is best for your photo.

And NOW the finished product!
I ended up choosing the filter Bright Fire under the Guest tab.  It has been one of my favorites lately and I love the brightness and warmth it gives the photograph.  Doughnuts deserve that don't you think?

Now to share a non-square photo!
If I would have squared up this photo it would have lost its effect.  My point was to show the contrast of a SoCal winter!  It is all about composition and what is pleasing to the eye...but that is another post entirely!

Did you find this post helpful?  Is there a certain topic you would like me to tackle in the future?!  Let me know in the comments below and don't forget to share if this post helped you!

I hope you enjoyed our very first Coffee And Cameras date!